


Page 35. Wilderness
Definition= a wild and uncultivated region, as of forest or desert, uninhabited or inhabited only by wild animals; a tract of wasteland.
Do you sometimes feel you are wandering in the wilderness, afraid and lost, without direction? Or are you an outdoorsy type, do you relish being outside in the countryside. If you were a wild animal what would you be? Maybe you are a delicate flower instead, battling the elements?
Tuesday, 30 August 2011
Sunday, 28 August 2011
52 pages 2011
Page 34 Tribal.
To me, the word tribal always makes me think of tattoos. I love them, either bold or delicate, I just love them. I prefer black and grey tattoos, I really don't care much for coloured ones. I would love to have a tribal tattoo on my foot one day, with the word 'explore' within it.
I started by gessoing my page. I had just got some black gesso for the first time ever. OMG it is black, I mean really,really inky black. In fact it is quite mesmerising, if the tub was bigger i would get in it for a paddle.
I drew a tribal heart with a white gelly roll pen.

then I painted this with my home made faux lumiere paint in red.

Normally at this point I would cover up the background with my main image, but I really liked this one so I just doodled the edge.

I did pretty much the same on the back, but a slightly different design, this one based on a friend's real tattoo.

Again coloured with red.

The edge doodled.

and a little text added.

Wednesday, 24 August 2011
Circle Journal
I know, I know I said I would never do one....BUT..after doing the MIMM journal with Kirsty and a fab bunch of girls, 10 of us got together and decided to do a circle journal. So I set up a little f/b group for just the 10 of us, we all ordered the same size Moleskine journal, and got started.
I chose a red journal, they are also available in Kraft,blue and black from HERE, they are cheap as chips, around £6.30 for a pack of three, and free postage.

We each have decorated our front covers, inside cover, first page and 1 tag. The books then get passed on and the next person will do a double page spread and 1 tag, before passing on the book again.
The main reason i have not joined in a circle journal before, is all the rules and specific themes that people insist upon. Apart from a few colour dislikes we don't have any specifics in these journals, the theme is free style, which is great!
The pages in these Moleskines are a bit thin to take paint, so they were glued together in pairs to make them stronger, then each pair was glued to the next pair, leaving the top open to create pockets for the tags. You start with 40 pages, and end up with 10 pages and space for 10 tags.

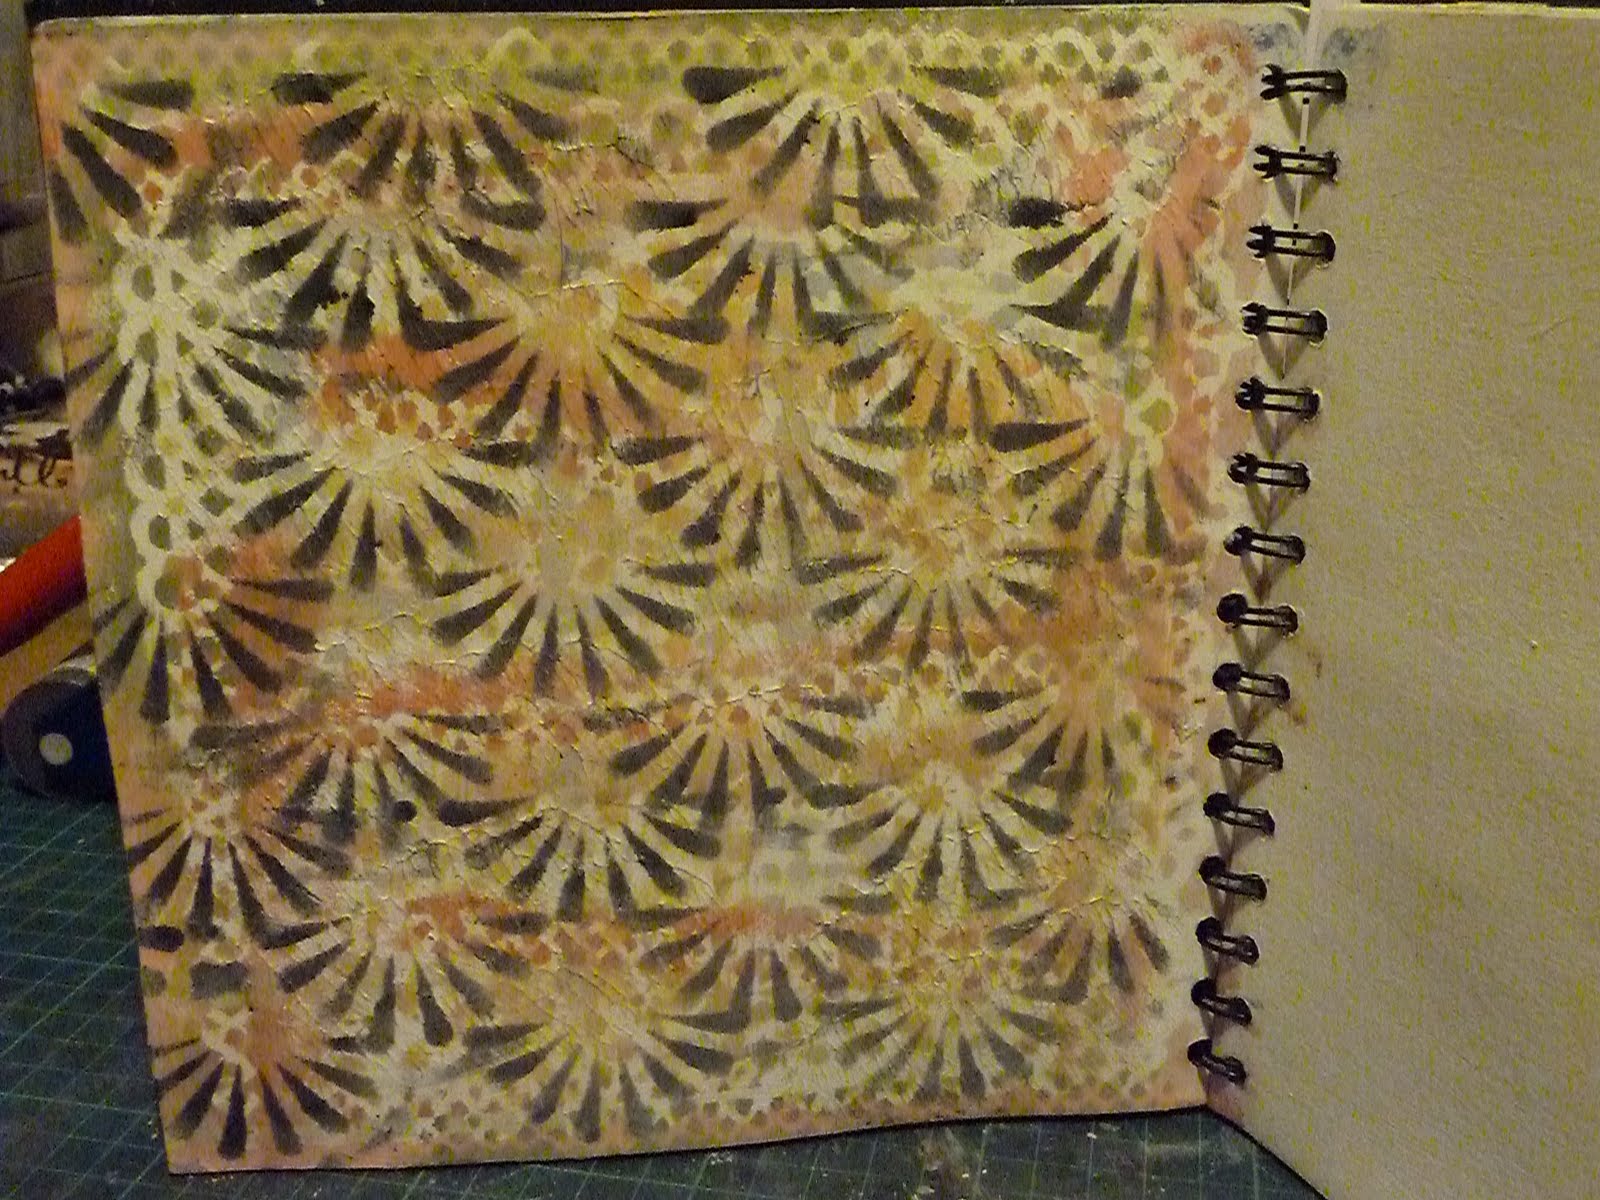
I gessoed my front cover,I put the gesso on really thickly in parts to create ridges, then started to paint it.

I used the faux lumiere paint that I made, which has a gorgeous sheen to it. I used green,purple and blue. then used dimensional paint to stencil the diamonds.

Next I added some stamped text.

using a stencil as inspiration i cut this girl out of printer paper and started to colour her, part way through I decided to give her a patterned paper dress.

She was glued to the front cover, I then added a small stamped bird and birdcage and the title. I don't know why but she just looked like she should be hula hooping....so after much trial and error..and bribery...I worked out how the elliptical circles should look...drew them softly in pencil then glued bakers twine down with matte accents.

I decided to do my inside cover and first page as all one spread. I painted the background again with lumieres. I added some drips and also pushed some gesso through an alphabet stencil and then colouring it once dried.

I printed out a black and white horse on printer paper, cut it out and then painted it with neocolors, adding a horn to make it into a unicorn. I then stencilled some seed head flowers to the page, added the unicorn and glued some stamped flowers in the foreground. I printed the title onto lightweight cream card and cut it out.

For my tag, I again painted using lumieres, did some stencilling and doodled a border.

On one side I added circles and this quote.

and on the other side I stuck a photo of me and some info.

and thats it all done. I now need to mail it out to the next person. I won't see this book again for 10 months, I will be so excited to get it back and see what everybody else has done inside it.
close up of stamped flowers.

close up of bakers twine hoops and singing birdie.

I chose a red journal, they are also available in Kraft,blue and black from HERE, they are cheap as chips, around £6.30 for a pack of three, and free postage.

We each have decorated our front covers, inside cover, first page and 1 tag. The books then get passed on and the next person will do a double page spread and 1 tag, before passing on the book again.
The main reason i have not joined in a circle journal before, is all the rules and specific themes that people insist upon. Apart from a few colour dislikes we don't have any specifics in these journals, the theme is free style, which is great!
The pages in these Moleskines are a bit thin to take paint, so they were glued together in pairs to make them stronger, then each pair was glued to the next pair, leaving the top open to create pockets for the tags. You start with 40 pages, and end up with 10 pages and space for 10 tags.

I gessoed my front cover,I put the gesso on really thickly in parts to create ridges, then started to paint it.

I used the faux lumiere paint that I made, which has a gorgeous sheen to it. I used green,purple and blue. then used dimensional paint to stencil the diamonds.

Next I added some stamped text.

using a stencil as inspiration i cut this girl out of printer paper and started to colour her, part way through I decided to give her a patterned paper dress.

She was glued to the front cover, I then added a small stamped bird and birdcage and the title. I don't know why but she just looked like she should be hula hooping....so after much trial and error..and bribery...I worked out how the elliptical circles should look...drew them softly in pencil then glued bakers twine down with matte accents.

I decided to do my inside cover and first page as all one spread. I painted the background again with lumieres. I added some drips and also pushed some gesso through an alphabet stencil and then colouring it once dried.

I printed out a black and white horse on printer paper, cut it out and then painted it with neocolors, adding a horn to make it into a unicorn. I then stencilled some seed head flowers to the page, added the unicorn and glued some stamped flowers in the foreground. I printed the title onto lightweight cream card and cut it out.

For my tag, I again painted using lumieres, did some stencilling and doodled a border.

On one side I added circles and this quote.

and on the other side I stuck a photo of me and some info.

and thats it all done. I now need to mail it out to the next person. I won't see this book again for 10 months, I will be so excited to get it back and see what everybody else has done inside it.
close up of stamped flowers.

close up of bakers twine hoops and singing birdie.

Monday, 22 August 2011
52 pages 2011
Page 34. Tribal
Definition=displaying loyalty to a tribe, group, or tribal values
Who is in your tribe, your family? Are you close knit and loyal to each other, or spread all over the world. How do you keep in touch?
Definition=displaying loyalty to a tribe, group, or tribal values
Who is in your tribe, your family? Are you close knit and loyal to each other, or spread all over the world. How do you keep in touch?
52 Pages 2011
Page 33 Bargain.
I am not convinced this page works at all, well I know it doesn't...but at the end of the day these little pages are a good place to play and experiment with different techniques. I do hope you don't come here expecting to learn something or to see an amazing finished page lol goodness knows I have nothing to teach lol So I am not happy with this as a page, but I do love the techniques used.
I started with my hot glue gun, not used this in ages, I drew my pound and dollar signs on the pages and applied the hot glue on top. If I had any patience i would have made them neater. I do not have patience, so they are messy, but I like that.

The glue dries almost instantly, so you can paint straight away. I decided to gesso first, just to give a little tooth over the glue itself.

Then I started adding paint.

I watered down my lumieres to make washes and added several colours, building the layers.
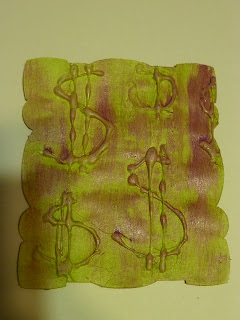
Until I had the colours the way I wanted them, on both sides.

I also added a little dimensional paint and some gold wax.

At this point I was really happy with it, and would uses the steps to here again.....but this was only meant to be a background, so I had to keep going to build the page.
I added some painted paper strips.

I still really liked it, and actually it would work as a stand alone piece just like this.....
but I had to add the images for this weeks words, I used old receipts and sale labels.I pressed them in and around the raised glue bits. I rubbed more gold wax on and uses some alcohol ink on one of the labels. then I added my title.

For the back the treatment was the same at all stages, with the journalling being printed out and being glued on last, again pressing it down inbetween the raised glue parts.

Friday, 19 August 2011
My MIMM with Kirsty Wiseman is finished.
Page 14, about my handbag.


Page 14, about my handbag.

page 15, about my makeup.

page 16,about my handwriting.

page 17,about music.

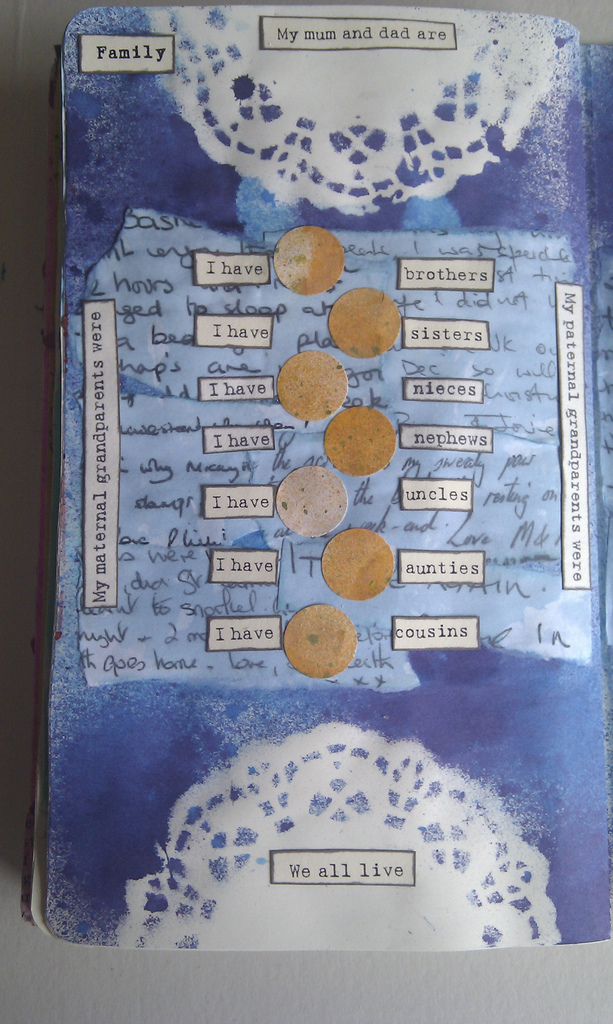
page 18, about my family
page 19, about my friends.

page 20, about food.

and finally inside the back cover.

in the photos you can see lots of prompts and blank spaces, these have all now been filled in with my journalling.
There are also 20 tags, hidden in the pockets made by sticking pages together at the sides. I coloured the tags and added some texture.

Then I decorated each tag and added journalling.

here is the book all finished, really thick and colourful.

Take a look at Kirsty's journal classes, you will really enjoy playing with them.
Tuesday, 16 August 2011
52 Pages 2011
Page 33. Bargain
Definition= an advantageous purchase, acquired at less than the usual cost
Are you a bargain hunter? What has been your best bargain? Do you save coupons? Have you fought over bargains with other mad-eyed shoppers?
Definition= an advantageous purchase, acquired at less than the usual cost
Are you a bargain hunter? What has been your best bargain? Do you save coupons? Have you fought over bargains with other mad-eyed shoppers?
Saturday, 13 August 2011
52 Pages 2011
Page 32 Discover.
I coloured the page front and back using distress inks.

On the front I added a photo of me at school. I was about 6yrs old. I printed the photo on regular photo paper, then sanded it. After gluing it down, I added more distress inks to the areas that had been sanded.

next I added white acrylic, more distress inks,some alphabet stamping and a couple of apples for the teacher.

I printed put my title, snipped it apart and glued it on, edging it with pencil and pen doodling.

On the back i stamped these pencil images, cut them apart and glued them on.

then I added my printed journalling.

Wednesday, 10 August 2011
Edge punches as stencils.
I have a couple of edge punches, well 5 I think...that's not really a lot in the world of edge punches, so when a lovely lady i met through Ustream offered to punch out some strips for me I jumped at the chance.
These are the strips that she sent, all just using lightweight cardstock. I decided to paint them all both sides with white acrylic paint.

I gave them a good couple of coats each side and left them to dry.
Then I tried them all out on a journal page, I sponged thru each one using distress inks.
As you can see they make fabulous stencils.

Obviously they got all inky...

but because they were well coated in acrylic paint, they are easily wiped clean and ready for use again. They are a little stained, but this doesn't effect them.

It is important to seal the strips either with paint or PVA glue, otherwise the strips will just get soggy and fall apart.
These are the strips that she sent, all just using lightweight cardstock. I decided to paint them all both sides with white acrylic paint.

I gave them a good couple of coats each side and left them to dry.
Then I tried them all out on a journal page, I sponged thru each one using distress inks.
As you can see they make fabulous stencils.
Obviously they got all inky...

but because they were well coated in acrylic paint, they are easily wiped clean and ready for use again. They are a little stained, but this doesn't effect them.

It is important to seal the strips either with paint or PVA glue, otherwise the strips will just get soggy and fall apart.
Subscribe to:
Posts (Atom)


.gif)


