Showing posts with label sewing. Show all posts

Friday, 12 September 2014

Bum Bag

Here is the 4th of my launch night samples. As I was off camping for the weekend I knew I would need something small but secure , big enough for my purse, phone and camera..

What else but a bum bag...

First off I had to find a pattern, that in itself was harder than I thought, for some reason there just aren't a lot of free bum bag/hip bag patterns around.. who knew?

Eventually I found one, but again I came up against a wall. The pattern was in German. After much translating and copying and pasting, and working out which bits of the pattern were relevant....I could finally begin. 

I cut some heavy weight white cotton, just a little larger than the pattern pieces. 

Next I mixed some Concrete Fresco paint with fabric medium and gave each piece a good even coat. 


My next layer involved a text stencil, this time I used Stone, Elephant and fabric medium


Layer 3. Slightly darker again, using  Elephant and a tiny bit of black Fresco and the fabric medium and the circle stamp from ESN 09. 


I also added the  scratchy lines from ESN10


I then added more black to my mix and stamped the circles from ESN10 This completed the background. 


Next I mixed Turquoise and Slate from JoFYs new limited edition colours, added some fabric medium and then stamped the feather from EDY09


and also the birds from EDY10


Next I used Red Geranium Archival ink to stamp the heart flower from EDY10.


I began to fill in the hearts, using  Blood Orange as the darker shade in the centre. 


Then I added Cherry from the JoFY range. 


I finished off by outlining the hearts with a permanent black pen. 


Now all the pieces were decorated, I let them dry thoroughly and also ironed them on the reverse. Then I was able to trim them to the correct size. 


Following the pattern I started to make the bag. Because the fabric is painted it is a little difficult to manipulate, but not impossible. You can see the bottom section is gathered, this was a challenge because of the stiffer fabric, but again it all worked out ok. 


Finally I added the straps and the buckle. This is the back of the bag. 


and the front..


As you can see it has 3 pockets, all with zips. Making this a really handy little bag. I had so much stuff crammed in here. Camera, phone, purse, toilet tissues, lip balm, mints, band aids. 


The wide top of the bag wraps around the hips perfectly. it was really comfy to carry around. 


I am so pleased with the way it turned out, and of course there is only one like it... It took 2 days to make, 1 to paint the fabric and the 2nd day to stitch it all together. 

If you would like to see the pattern then go to THIS WEBSITE , here you will find the 5 pages of instructions. There are lots of variations within the pattern so you can choose exactly what kind of pockets you need. It was originally a sew-along. The lovely owner of the blog has some great patterns, so go and check them out. 


Darcy x


Friday, 3 January 2014

Documented Life Project

A couple of weeks ago I saw a tweet by  Roben Marie Smith, I followed her link and discovered THIS BLOG POST if you haven't already seen it then do go take a look. All the details are there and there is a link to the FB group too. 

Basically over 2014 Roben and 4 other artists will be issuing weekly prompts that will encourage and inspire you to create, decorate and fill in your journal/planner/diary.... whatever you choose to use. 

I was so excited to read the post, not because I had been looking for something like this, but because I had literally just finished making a journal cover, but I had no idea what I would use the journal for... it was fate!!!

So I decided to join in, and that meant adding even more to my journal... I wanted to show you how my journal looks now, right at the beginning of the year. 


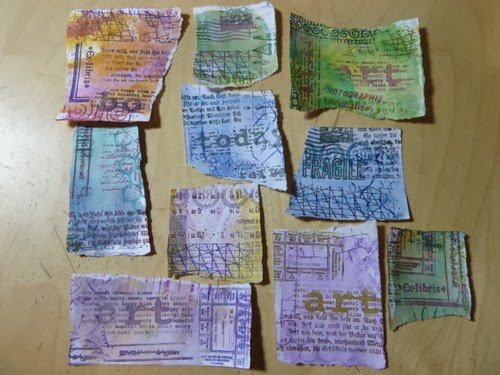
I started by making a whole load of patchwork pieces, you can see how I did them in THIS POST..for these particular pieces I used markers, but you can do this technique with paints too. 

I did some patchwork pieces a while back and used paints on them, see how I did them in THIS POST . So it is up to you how you colour them, markers, watercolours,acrylic...

so once I had my patchwork pieces I needed to fix them to a backing paper. I measured my paper out by wrapping it around my journal, with enough length to fold over to the inside covers. 


Then i dabbed glue stick on each patch, and stuck them to the backing paper, making sure to overlap them. 


Then I used my sewing machine to zig zag between all the pieces, to fasten them down. 


Make sure you use a pretty coloured thread that matches in with your patchwork pieces.. 


then turn the whole thing over and glue on some lining paper, this will hide all the back of the stitching. I just used black wrapping paper. 


next, stitch all around the outside edge then fold in the 2 short ends and stitch those into place. You now have 2 end 'pockets'. Slip the front and back covers of the journal into the pockets. 


Here is how it looks now..


I love how the colours look together..


Here is how the inside looks, it has become very fat over the festive period. I expect it to get even bigger over the year. Hopefully I will be able to keep up with the prompts and totally fill my book, if I do then I will show another flip through video at the end of the year. 


All the page edges have been covered in washi tape. 


Getting thick, I love this...


 My calendar pages...I don't plan on writing much. 


Video flip through...


Darcy x


Sunday, 29 December 2013

Patchwork Diary

So this is not a new technique, I have shown it a couple of times before, using the pieces to make book covers and to cover boxes for storage, but as I am always asked how I made them i shall show you the latest bookcovers using this technique. 

Previously I had used acrylic paint to colour my patchwork pieces, but this time I used my Letraset markers. 

To start with I scribbled on a craft mat with Aquamarkers, I spritzed this with water. 


then I ripped up some pieces of cheap cartridge paper, and dragged them through the ink. 


next, and still using the Aquamarkers, I scribbled onto some stamps and then stamped the edges of all the pieces. I used complementary colours, so that the edge stamping becomes part of the background. 


To create the focal decoration on the pieces I used the Sara Naumann journal stamps from paperArtsy, I switched to the Limited Edition Promarkers and chose colours that would stand out against the background. So on the green background I used a red and on the purple I used a yellow and so on. 


Now to assemble all the pieces. I took another piece of cheap cartridge paper and cut it to size, measuring it around the diary. It needs to be slightly bigger in height than the diary and long enough to go around the front and back covers, and also enough to fold over inside. 


once the backing paper is cut to size you can start to add the patchwork pieces, I always dab a little glue stick on the back of each one. You don't need to glue the whole piece, just a dab in the middle to hold it in place while you sew. Make sure to slightly overlap each of the pieces. 


thread up your machine with a nice coloured thread and set it to zig zag. Now stitched over all the raw edges to hold them down. 


To finish it off and to cover all the backing threads, glue a piece of thin paper onto the inside of the cover. I used black wrapping paper. 


As soon as this is dry, you can stitch all around the outside edge, again with zigzag, then fold in the 2 short ends and stitch those into place, creating 2 end pockets. Now you can slip the front and back covers of the diary into the cover. 


I finished mine off with a little artwork on the front cover, again using the limited edition promarkers. 


I loved it so much I ended up making 3 of them, I will show you them all in another blog post on Weds. 


in the meantime how would you like to win some of the Aquamarkers. 


To win I need you to do TWO things for me, please do BOTH otherwise I cannot enter you. 

1. go to my post on the Letraset blog and leave a comment there.  LETRASET BLOG LINK

2. come back here and add your name to the link up tool.            

I will announce the winner on Monday 6th January. 


Thursday, 12 December 2013

Hanging Up the Stocking

So Christmas is fast approaching, are you ready for it? One thing you need to have ready is your Christmas stocking, otherwise where will Santa put your gifts....coal if you have been bad lol 

I decided to make a new one..  I started with white fabric. 


I did some painting and stamping...


and I ended up with this... so freaking cool...


Come over to the PaperArtsy blog and see all the photos that show how I made it. 

Darcy x

Sunday, 23 June 2013

Guest blogging for PaperArtsy June project 1

Wow, the month has flown by so fast. it is my turn on the PaperArtsy blog again.

First up this month I played with fabric.

After seeing THIS VIDEO... I knew I wanted to use the phrase 'Make Good Art'

I made myself an art apron, I love it...now my only problem is can I bear to use it and get it messed up lol


Go on over to the PAPERARTSY BLOG... and see how I made it. If you join in and made something inspired by my post you can win a prize. 


I will be back tomorrow with another project.  So watch this space.

Thursday, 7 June 2012

Sewing Day

Today I met up with a few friends for a sewing day, every so often we rent a room in a community centre and we take our sewing machines and fabric and create things of wonder and glee.

I had been wanting a 'thread catcher' for a while. Basically it is a pin cushion that sits next to your sewing machine, with a little bag that hangs down in which to put all the ends of thread as you work.

But then I saw this little tool caddy...

click this link

and I thought how handy is that, and how can I combine that with a thread catcher....so that is what I made today.

This is the hexie caddy...the only changes I made were to use mount board instead of cereal box card, as I wanted it stronger. I also put some weights inside each section so it doesn't pull off the table.


In order to attach the thread catcher I added a strip of fabric with a buttonhole...


I then made the thread catcher...and added a button inside..


and so when you button them together you get a tool caddy/pin cushion/thread catcher..


and with the tools and pins in place...


I used 3 fat quarters, all were in the sale at 50p each....so it turned out pretty cheap too lol