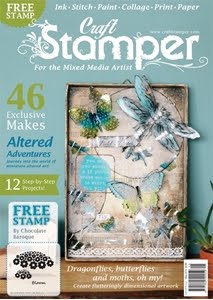
So last week, my newest rubber stamps had their official online launch. On that night I just showed examples of what could be made, this week i will show my 4 samples in step by step blog posts.
Today is the metal butterfly.
I started with an 8x8 grey/white board , I painted a thin layer of Snowflake paint over the board and dried that. Then I then scribbled and blended all over the board using Fibralo pens. You can blend with a damp finger, a damp brush or a damp baby wipe. Note I say damp, not wet.. as these pens are very juicy you don't need much extra moisture at all.
Next I scribbled some fibralos onto a craft mat, added a little water, then dipped the side of my ruler into the ink. I added this in criss cross lines over the board.
Once these lines are dry, I splattered some clean water over the board, laid a piece of paper towel over the board and gently pressed. this absorbs the reactivated ink and leaves these great white spots.
I then used the dry stone wall stamp and the flock of birds stamp from EDY10. I used the wall top and bottom of the board and the birds in the centre using a dark blue ink pad.
finally to finish the background I added some grunge paste around the outer edge, once dry I coloured this with Treasure Gold.
I love using this as an edging medium..
Now to create the focal butterfly.
I cut my butterfly shapes from metal card. Top wings, bottom wings and a body piece.
I painted each piece with nougat paint, then stamped with flowers and text and coloured in with more Fibralo pens.
Then I changed my mind slightly, I painted over the top wing, again with Nougat, then I painted and shaded them before stamping with the heart flowers.
Either way would work, I just found doing the background first worked out for me.
The top wings were stamped with the heart flower from EDY10 and the body was stamped with the feather from EDY09
I turned the metal card over and resting on a dense foam piece, I used a teflon tool to create the veins in the wings.
The bottom wings were stamped with the pointy leaf and stem from the spikey flower on EDY09. I then cut around the 'leaf' ends.
The body is stamped with the feather and one of the text-filled leaves. Again I turned it over and worked the lines with a teflon tool.
i painted another piece of metal card then stamped the leaf and stem again from EDY09.
I worked into the back of them with a teflon tool,and the carefully cut them out.
Here are all my butterfly pieces, etched and curved, ready to attach to the board.
First I attached the bottom wings, using large blobs of matte gel to support the wings and keep them 3d.
next i added the top wings, and used matte gel in the same way to support the curves.
Finally I added the body and the antennae.
It needed a title of some sort, so using my old typewriter I typed out this phrase.
So there it is, all finished. I am so pleased with this piece. From the Fibralo background to the moulded metal card, it all works great together.
I hope you have enjoyed seeing the process and that I have shown how versatile the stamps are. .. that they don't have to be just used exactly as they are, but can be used in parts, combined, cut apart..... and used to create all kinds of things.
I will be back later in the week with the step by step instructions for my decorated clock.
Darcy x


.JPG)
.JPG)


.gif)


I do love this butterfly and this is a great- step by step - especially for showing the versatility of your stamps! I've already been experimenting myself - just can't leave your stamps alone! I know a certain little girl( my GD) who would love a butterfly similar to this so hope to give this a go too! Thanks for the inspiration, Chrisx
ReplyDeleteThis is beautiful. Love how you worked the metal and it really gives great dimension to the butterfly
ReplyDeleteLove this project, you are so right about using bits of stamps. Must try the metal card x
ReplyDeleteThis is just beautiful!!! Love how you used the heat petal flowers for the butterfuly wings.
ReplyDeleteOh this is awesome. Can't wait till I get my stamps.
ReplyDeleteThis is absolutely fantastic, Darcy! Love it. x
ReplyDeleteLove this! xxx
ReplyDeleteFantastic way to use your stamps Darcy, i love how you can see so many different ways to use them and thank you for sharing. Your butterfly is amazing :-) xxx
ReplyDeleteOhhhh!! This is so gorgeous Darcy! 3D butterfly is very beautiful and great idea. I love it. Can't wait to arrive my stamps xx
ReplyDeleteThat's lovely. The butterfly looks great against the gorgeous background.
ReplyDeleteWOW!! That butterfly is AMAZING!!! I love it!!! =)
ReplyDeleteFabulous design, fabulous tutorial.
ReplyDelete