Showing posts with label promarkers. Show all posts

Sunday, 20 November 2016

Quick Cards

Evening all, sorry I have been missing. I shall catch up with you all soon and tell you what I have been up to. 

For tonight though please do pop over to the PaperArtsy blog and see how I created these quick cards. 


The backgrounds on these cards are done just with promarkers, also if you go and see the post you will see how I made my own  Baker's twine.. 


Darcy x


Monday, 27 April 2015

Celebrate with Winnie

This past week was my niece's birthday, she is  a huge fan of the Winnie the Witch books. I copied out the witch and cat from one of the book covers, and then I added balloons and gifts. 

This was all outlined with a Letraset black fineliner..


I then coloured it all with Letraset promarkers. 


I finished it off by mounting onto red card and then a large white card blank. 


Darcy. x


Monday, 29 December 2014

Happy New year

So much is made of Christmas cards that we forget about new year, i think for the special people in your life it is lovely to ring in their new year with a special message. 

The brand new Letraset Autumn /Winter pens are now available, yummy colours as always. 


I decided to keep the base of my case clean and white.. and just add some pops of colour. So I began by colouring some white card with Halloween and Storm Cloud. 


Of course Promarkers work on more than just card. Here I have coloured some white satin ribbon using Mustard and Pesto. This gives a two tone grungy appearance. 


I added the ribbons to the coloured card pieces. 


I stamped out these 3 poinsettia images onto watercolour paper, promarkers will spread a little more than usual on this paper, so care must be taken, but the overall effect is lovely and soft. The leaves are again Mustard and Pesto. The flowers are Hallowen, Sunset and Firebrick. 


I added my coloured strips to the white card base. 


Promarkers are perfect for colouring embeliishments such as these white pearls. 


I die cut 2 nesting shapes, colouring the larger one with Sunset. On the smaller one I used Storm Cloud on a rubber stamp to add snowflakes and then stamped my sentiment over the top. 


I used the pearls to accent the sentiment and for the centres of the flowers. 


I love these flowers, they have such depth..


I have one pack of these new colours to give away.To be in with a chance of winning you must do TWO things. 

1.Please leave a comment over on the Letraset blog for me and 
2. add your name to the linky below. 


Monday, 24 November 2014

Pop Art Planes

My friend and fellow artist Jay, drew out this face. Instead of adding lots of facial details he has just picked out the planes of the face,arms and hair. 

Planes show the high and low areas, ie; the areas that stick out and are therefore highlighted, and the lower areas that are flat or sunken in and are in shadow

I wanted to create a face using funky colours that you would not normally associate with skin, and this is the ideal way. Jay very kindly allowed me to use his sketch.

This was drawn out very lightly in pencil ( I darkened the photo so you can see it, but actually the pencil lines are very light)


I am using a combination of the Spring/Summer Ltd Edition set and the new Autumn/Winter Ltd Edition set from Letraset Promarkers. These 2 provided me with a great selection of colours with which to colour this face. 

I started with Mustard Green. 


Next I added Pebble Blue and Wild Orchid. 


Next I added Summer Sun. 


Now for a bold splash of Sunset. 


Next I filled in the face with Cloud Blue and started adding Verdigris to the hair. 


I finished the hair with Peacock Green. 


The flower was done with Pink Pearl and Silver Lining. The eyes,brows and inside of the flower were done with Storm Cloud, and the shadows under the hands were done with Firebrick. 


Almost done, at this point I just added white pen to the eyes and bottom lip. 


It looked a little unfinished, so I took a Letraset Fineliner 0.3mm, and outlined the central features and the main shapes. Note I did not outline the changes of colour within a shape. 


This latest set of colours are just lovely, look out for them at your local Promarker retailer. 

Monday, 27 October 2014

Holly and Lights

Hi everyone, for this month's Letraset make I have gone all festive with an early Christmas card. 

I started by roughly sketching out some holly leaf shapes, this is a really easy shape to draw but you could cut one from an old card to draw around, or you could stamp your leaves. I used Letraset fineliners in both 0.3 and 0.5mm to outline the leaves. I also added in 3 tear drop fairy lights. 


I pulled out several greens and blue-greens in my Letraset Promarkers. 


Next I started to colour each holly leaf. Do each half a different shade to add interest, and don't forget the centre vein . 


Here you can see all the leaves done in various shades. Each is done with a darker shade next to the outside edge with a lighter shade blended over the darker one. The red berries are each done with two shades aswell.


Now for a little shimmer, colour the fairy lights using Letraset Metallic markers. 


To create a fineliner to colour the string, I added a Letraset fine nib to a brown Promarker, this instantly makes it a fineliner.. 


Next I scribbled on a craft mat with a green metallic marker, I spritzed with water and picked up the ink on a brush. I used this to fill in the background. 


I finished the background by running a black metallic marker around the edges. 


Now to add the details, I went back to my 0.3mm black fineliners and added patterns to all the leaves. 


I mounted the coloured piece to a white card blank , and added a stamped greeting. 


As a final touch i used a grey Promarker to lightly outline everything, this just makes them stand out a little from the green background. 


I have a pack of Metallic markers to give away.. 


To enter please do TWO things for me. Go to my post on the letraset blog and leave a comment AND add your name to the linky below. 


Monday, 22 September 2014

Canvas tags

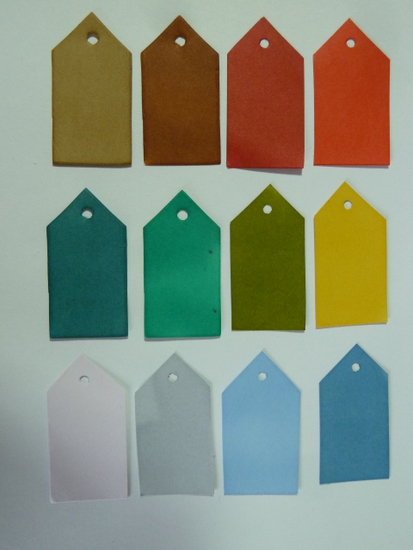
These canvas tags are so quick and easy to make. If you are anything like me you save the tags from new clothes, especially the ones that come with fabric tags.. now you can make your own. 

Canvas on a roll is fairly cheap and can be bought from art shops, you can also find sheets of canvas sometimes in the pound/dollar shop. 

Cut your tags, either by hand or using a die cutting machine. 


Take a selection of markers and add some random scribbles, or more deliberate patterns... up to you..


Put a little rubbing alcohol into a small pray bottle, and spray your canvas tags. the ink will disperse, if you tilt the tags the ink will run. You can leave it to dry or if you feel there is too much ink then blot some away with a paper towel.  You are left with these lovely softly blended backgrounds. 


Distress the edges


Then add your favourite text stamps. I used Hot Picks XT03


A bit more stamping..

Final bit of distressing and some eyelets added. I then coloured the 'brass' eyelets with my markers to match the tags. 


You could use these on a card, or a scrapbook page, or just add to a gift. 


I have a pack of Vibrant Tones to give away. To be in with a chance of winning please do the following TWO things.

Go to my post on the Letraset site and leave a comment AND add your name to the linky below here.


Monday, 25 August 2014

Limited Edition Markers.

Are you still enjoying sunshine? thankfully here it is a little cooler now, though at times the heat still becomes unbearable... I find my self reaching for scraps of paper to waft myself cool....

What I needed of course is a pretty fan to do the job, so I made one. 

This is absolutely not my invention, there are instructions for these all over the internet and youtube. 

I wanted mine to be light and delicate, so I decided to use Deli paper. I wasn't sure how Letraset promarkers would react to the shiny dry waxed side, so I played around for a while and discovered they work great. They don't dry immediately like they do on more porous surfaces, this made them easy to blend. 

So I started by taking 2 sheets of deli paper, and using Memento ink in black, I stamped all over the sheets with some flower stamps. {sorry I have no idea who these stamps are by, they are pretty old}


I then used the new limited edition Promarkers to colour and blend. 


You will recognize some of these colours from other collections, but due to popular demand by Promarker fans these colours are now available in the Promarker bullet nib....Out of all the ranges this is my favourite nib, so I am pleased these colours have been added. 


Once my flowers were all coloured in, I glued a second, blank, piece of deli paper to the back to add a little strength, then I added a light coat of matte medium to the front. This again adds a little strength. 

Next I folded the papers, concertina style, and glued the 2 sheets together, making one larger piece. 


Folded in half and tied with a piece of thread that has been coloured with one of the new markers. 


Now I can shape the fan, glueing together the middle folds. 


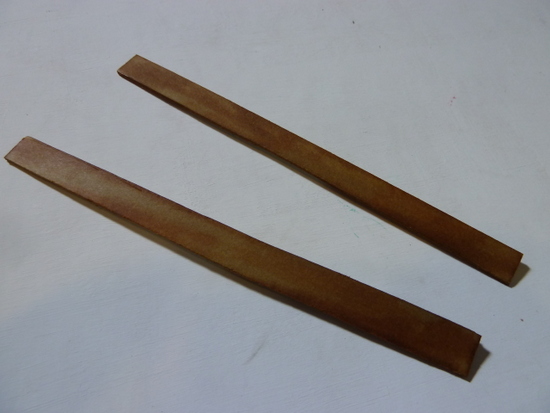
I cut 2 lengths of greyboard and coloured them with 2 of the new browns. 


I stuck these onto the fan edges . 


Once opened it looks like this.. it worked great, but needed something to hold the handle parts together. 


Finally i punched a small hole in one of the greyboard sticks and added a piece of ribbon and 2 beads, these were all coloured with the markers. 


The ribbon and beads hold the fan closed when not in use, but also hold the handle part together when the fan is being used. 


Pretty and delicate and works perfectly.....ahhh cool breeze!


How are you keeping cool this summer? if you would like to make one of these, I have a set of the new markers to give away. 


To be in with a chance of winning you must do TWO THINGS FOR ME

1. go to my post on the Letraset blog and leave a comment...CLICK HERE

2. Add your name to the linky below.