Showing posts with label Eclectica³ Sara Naumann. Show all posts

Thursday, 10 September 2015

New Stamps.Night 4: Sara Naumann

Tonight our lovely designer from across the world, Sara Naumann brings us her latest designs. Two wonderful winter themed plates are on offer for you, come and see what great samples our designers have been making. Pop to the PaperArtsy blog to see it all. 


oooo great teasers huh? come over and see the full plates on the PaperArtsy blog. 


All these stamps are now available from your favourite PaperArtsy retailer, so please do support them. 

Darcy x

Monday, 23 February 2015

Snowy Days Journal Page

hi, this is a journal page that I started a while back..and then got busy… and have now finished. it was created on a really cold, snowy day at a local crop. I didn’t take step out photos but i can talk you through it.
I used the winter Limited Edition paints from last year.
Step 1. Scrape a little of Turquoise, Marlin,Hint of Mint and Evergreen over the page. leaving some white gaps.
Step 2. Add background stamping of a cracked image using cornflower blue and  small numbers from Mini 23 using black archival.

P1170083
Step 3. Add strips of washi tape in similar colours to the paint.
Step 4. Stencil some random letters using Slate.

P1170085
Step 5. Add lines around the outer edges with ESN 10

P1170086
Step 6. I then stamped the snowflake image from EDY 04 again using cornflower blue.
Step 7. Cover the whole page with a light layer of Metallic Glaze. This adds a gorgeous wintery shimmer all over.
Step 8. More snowflakes from EDY 04 , this time using Snowflake paint, then some stencilled spots also in Snowflake 

P1170084
Step 9. The final step in the background was to mix some Grunge Paste with Snowflake and use that with a snowflake stencil. Once this was dry I added some glitter gel.

P1170102
Now to create some wintery flowers.
I took a piece of regular smoothy and added some book text, music paper and scraps of patterned paper. Although this gets covered up it does give a great starting point and it adds texture.
Over the ephemera I blended Turquoise Cherry Red Marlin Evergreen and Plum. Over this I added some script stamps, and stencilled some Snowflake through a circle stencil and some star sequin waste.
This gave me a great piece of patterned card. I then stamped lots of the petals from EEV 09 plus the circle centres. These were all cut out and arranged on the page.
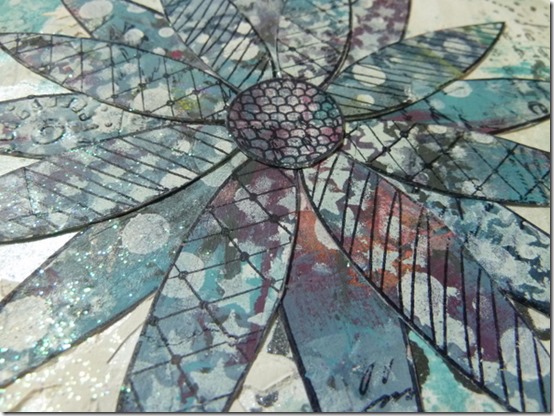
P1170082
Again once these were dry I added a light brushing of glitter gel. It is very subtle but at the right angle it does sparkle.
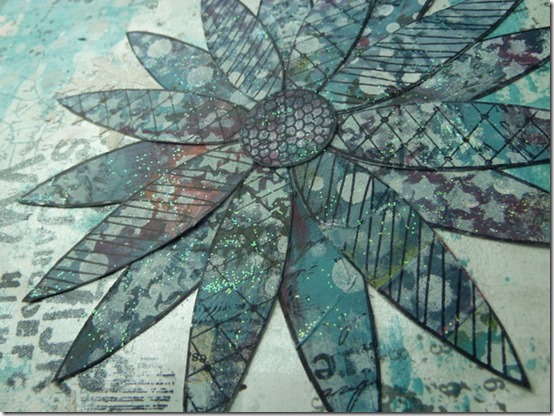
P1170101
So this is how it looked when I got home from the crop, and I loved it.. but it needed something more.. a title.

P1160760
I took more regular smoothy and scraped on some Cherry Red Turquoise and Plum.

P1170087
Then using a credit card I added lines of Marlin and some circles using a lid and Snowflake, I then added small circles using Slate.
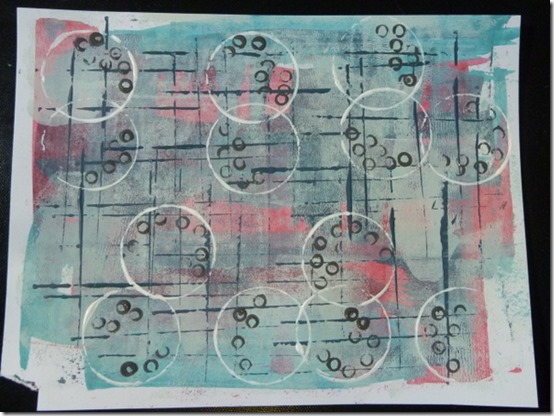
P1170088
I used the alphabet from Jofy 21 to stamp out my title, this was all cut out.

P1170089
I decided where I wanted my words to go and then stamped then again onto the page. I did this because the letters have scribbly bits on the edges, these get cut off when cutting them out. So by stamping them onto the page and then glueing in the painted letters I still get the scribbly bits showing.

P1170090
I am not too sure about the title, i think it blends in too much?
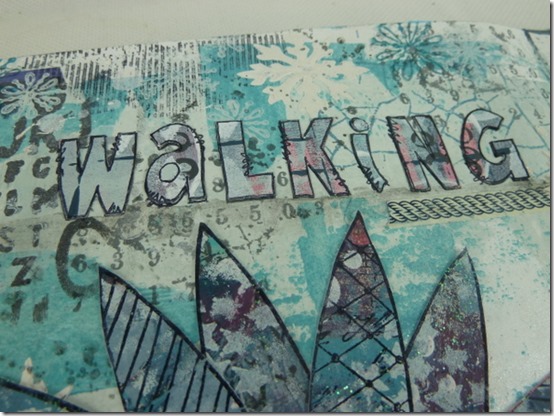
P1170093
maybe it needs some shading?

P1170094

P1170098
The photos have bleached the colour a lot, in reality the Turquoise is very prominent.

P1170105
Darcy x

Thursday, 19 February 2015

Demo Tag #3

Morning, here is the 3rd of the tags that I took to Stitches. This one is quite different for me, I don’t usually do vintage, but wanted to try it out with this tag.
I started by glueing book text to a piece of smoothy and once dry I added French Roast which was quickly wiped off just leaving a stain behind. Then I did the same with Buff, dried the tag and added more Buff and finally drybrushed with a little Snowflake.

P1160935

You can just see the text from the book pages peeking through.


P1160936

I die cut 4 small tags and painted them with Buff. I then stamped on them using images from my collection and some from ESN15, using Tree Branch, Orange Blossom and Potting Soil Archival inks.

P1160937

I stamped the flower heads from EDY11 onto painted heavy smoothy and also painted a small button, I later decided this was too small and painted a slightly larger one.

P1160938

Here you can see I attached the 5 flower heads together with the button centre. On another tag I painted cotton tape and stamped over it, this was just wrapped around the tag. I added the triangle leaf and some lace to the 3rd tag, and small rectangles stamped with the border from EDY11 onto the 4th small tag.

P1160944

Finally I mounted the small tags into more book pages pieces and then glued them all to the backing piece.

P1160990

I think they work pretty well and shows that my quirky,weird,alien flowers can work in a vintage setting too.

Techniques here are.. using a vintage palette, layering images in the background using different but similar shades of ink, using book text, painting on tape and buttons. 
Darcy x